This is the installation tutorial for IT8 i5-8259U Hackintosh macOS Monterey 11.6.8
I had been using a MacBook Pro 2016, but I decided to sell it when I needed to use Windows at my company office. During the epidemic, I purchased a GEEKOM IT8 out of boredom and installed Windows on it. Recently, I spontaneously decided to try setting up Hackintosh and documented the installation process by following various online tutorials. After successfully installing it, the system worked flawlessly. The IT8 is equipped with an i5 8295U CPU, which is the same model used in the MacBook Pro 2018. Additionally, it boasts Intel® Iris Plus Graphics 655, delivering more than double the performance of UHD630 core graphics. I put it to the test and found that it handled tasks such as document processing, web browsing, Photoshop, Visual Studio, and 4K HEVC video hardware decoding with ease. The overall performance was exceptionally smooth.
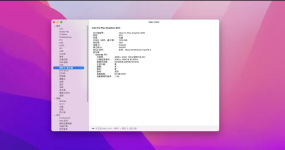
Tools and software to be prepared:
Download URL
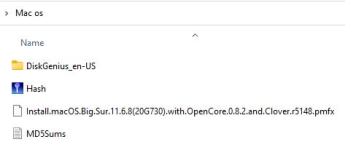
2. Verify if the macOS ISO is corrupted during download:
3.Make a USB flash drive:
4. IT8 BIOS setup
5. macOS installation
6.Three code injection
After completing the system installation, you will need to inject three codes into Hackintosh to ensure its functionality, prevent number blocking, and unlock features such as iCloud, FaceTime, iMessage, and Flight following.
Follow these steps:
7.Hard disk EFI boot establishment
After successfully installing the new system, the EFI boot remains on the USB drive. This means that each time you want to boot, you must use the USB drive, which is not convenient for regular use. To address this, you need to copy the EFI file from the USB drive to the EFI partition on your disk,allowing you to boot directly from the disk without relying on the USB drive.
To proceed, please follow these steps:
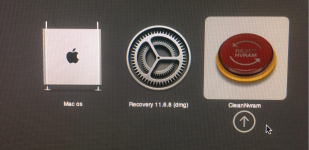
Once you have completed these steps, you can reboot your system and remove the USB flash drive. Right-click on the boot screen and select "CleanNvram" to clean and validate the new EFI settings. Afterward, return to the boot screen and select macOS to boot the system. From this point forward, the system will automatically start from the hard disk.
By following these instructions, you will configure the power settings for perfect hibernation and ensure that the system boots directly from the hard disk without relying on the USB flash drive.
I had been using a MacBook Pro 2016, but I decided to sell it when I needed to use Windows at my company office. During the epidemic, I purchased a GEEKOM IT8 out of boredom and installed Windows on it. Recently, I spontaneously decided to try setting up Hackintosh and documented the installation process by following various online tutorials. After successfully installing it, the system worked flawlessly. The IT8 is equipped with an i5 8295U CPU, which is the same model used in the MacBook Pro 2018. Additionally, it boasts Intel® Iris Plus Graphics 655, delivering more than double the performance of UHD630 core graphics. I put it to the test and found that it handled tasks such as document processing, web browsing, Photoshop, Visual Studio, and 4K HEVC video hardware decoding with ease. The overall performance was exceptionally smooth.


Tools and software to be prepared:
- macOS ISO with EFI/OC boot
- DiskGenius disk ISO writing tool
- U disk (capacity ≥ 16GB, read and write performance as good as possible)
- a Windows operating system computer (or IT8 ready to install macOS)
Download URL

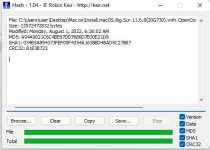
2. Verify if the macOS ISO is corrupted during download:
- Open the Hash.exe tool.
- Click on "Browse" and select the file named "macOS Big Sur 11.6.5 20G527 Installer for CLOVER 5143 and FirPE.dmg".
- The program will automatically check the MD5 value of the file.
- Compare the MD5 value with the one provided in the MD5Sums file: A94A9021C6C4BE67DD7686D7B30E21D9.
- If the MD5 values match, the file is consistent and not corrupted.
- If the MD5 values do not match, the file is corrupted and needs to be downloaded again.

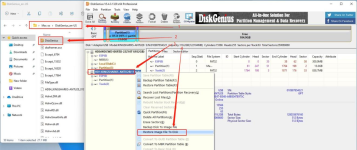
3.Make a USB flash drive:
- Obtain a USB flash drive with a capacity of 16GB or more (it is recommended to choose one with better read and write performance).
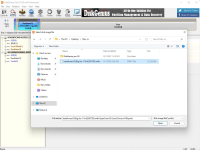
- Run DiskGenius_en-US\ DiskGenius.exe as an administrator in Windows.
- Select the USB flash drive intended for use as the boot disk.
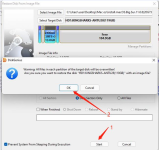
- Right-click on the selected USB flash drive and choose the option to restore the ISO to the hard disk.
- Select the USB flash drive where you want to write the ISO.
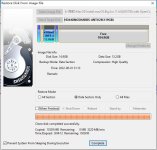
- Click on "Flash" to begin the process.
- After the writing is finished, close the program and insert the finished boot disk into the IT8.


4. IT8 BIOS setup
5. macOS installation
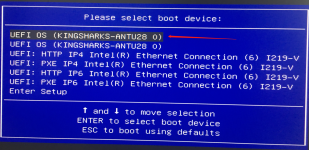
- Insert the boot USB drive and boot up your computer. Press F7 to enter the boot item selection menu.
- Use the arrow keys on your keyboard to navigate to the first boot item of the USB drive (there are two boot items in the USB drive directory).
- Press Enter to access the OC boot interface.
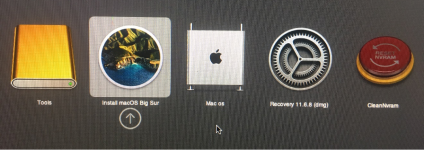
- From the OC boot interface, select "Install macOS Big Sur" and the Apple icon boot screen will appear. Once the boot process is complete, you will enter the installation options screen.
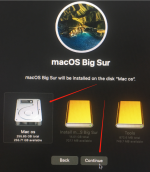
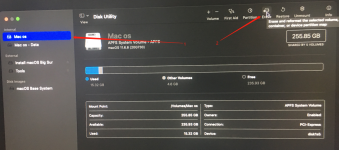
- Click on "Disk Utility" and choose the hard disk where you want to install macOS (it is recommended to select a whole hard disk without any partitions).
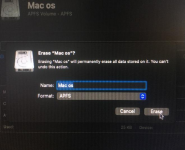
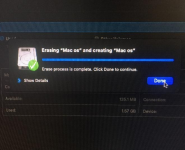
- In the upper right corner, click on "Wipe." A pop-up window will appear where you can enter the disk name. Choose the format as APFS, then click "Wipe" and confirm the action. Once finished, close Disk Utility.
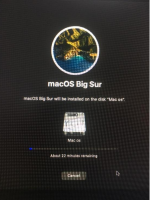
- Return to the installation options screen and click on "Install macOS Big Sur."
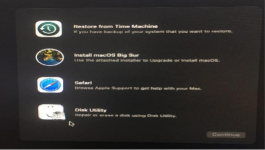
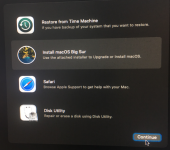
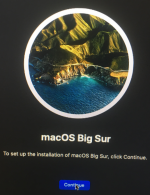
- Proceed with the installation by selecting the option to install macOS and wipe the hard drive. Click "Continue."
- The system will automatically install the next steps without any manual intervention. The installation process will involve several reboots, and the duration will depend on the read and write performance of the USB drive (hence, it is recommended to use a USB drive with better read and write performance when creating the boot disk).
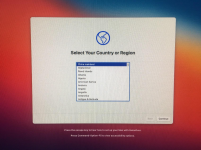
- After several automatic reboots, the installation and deployment of the macOS will be completed. The welcome and settings interface will be displayed.
- Follow the prompts and set up the necessary configurations. Note: It is advisable not to connect to the internet or set up iCloud at this stage.


6.Three code injection
After completing the system installation, you will need to inject three codes into Hackintosh to ensure its functionality, prevent number blocking, and unlock features such as iCloud, FaceTime, iMessage, and Flight following.
Follow these steps:
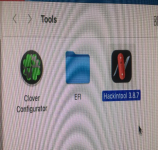
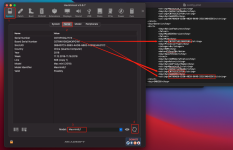
- Open the "Tools" disk and find the file path "/EFI/OC/config.plist" using a text editor. Locate the PlatformInfo configuration section within the file.
- Open Hackintool and switch to the "System" page. Click on "Serial Number Generator" and then click the refresh button located at the bottom right corner to generate new numbers.
- The first three items displayed in the "Serial Number Generator" are the three codes. Copy these codes from Hackintool.
- Paste the copied codes into the corresponding fields in the config.plist file, according to the shown correspondence in the figure.
- After copying, save and close the /EFI/OC/config.plist file.

7.Hard disk EFI boot establishment
After successfully installing the new system, the EFI boot remains on the USB drive. This means that each time you want to boot, you must use the USB drive, which is not convenient for regular use. To address this, you need to copy the EFI file from the USB drive to the EFI partition on your disk,allowing you to boot directly from the disk without relying on the USB drive.
To proceed, please follow these steps:
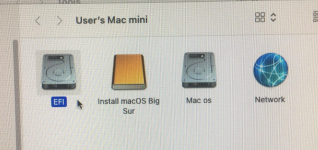
- Keep the boot disk connected and avoid removing it.
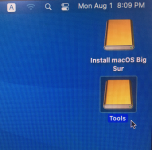
- Open the "Tools" disk located at the upper right corner of your desktop.
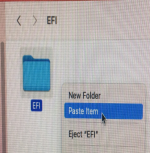
- Click on the EFI folder and right-click to copy it.
- Launch Hackintool 3.8.7 tool.
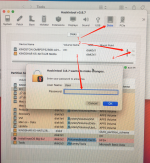
- Navigate to the disk section in Hackintool and click on it.
- Use the up and down arrows to mount the EFI partition.
- Enter your password when prompted and click OK.
- Open the local disk within the Hackintool interface.
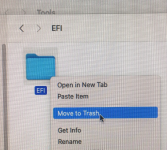
- Access the EFI disk and open the EFI folder.
- Right-click on the EFI folder and move it to the trash or wastepaper basket.
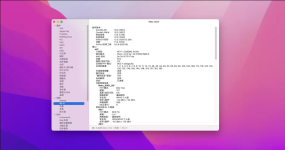
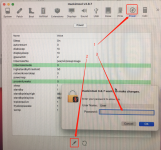
- Switch to the "Power" page, as shown below.
- Click on "Fix deep hibernation reservation".
- Enter your login password and confirm the action.
- Make sure that the hibernate mode and wake options are highlighted in green.

Once you have completed these steps, you can reboot your system and remove the USB flash drive. Right-click on the boot screen and select "CleanNvram" to clean and validate the new EFI settings. Afterward, return to the boot screen and select macOS to boot the system. From this point forward, the system will automatically start from the hard disk.
By following these instructions, you will configure the power settings for perfect hibernation and ensure that the system boots directly from the hard disk without relying on the USB flash drive.


